For most beginners, the best first choice is a purpose-made, clear, straight-sided glass candle jar in one modest single-wick size because that profile is simpler to size, observe, and repeat than random household glass or highly decorative vessels.
Glass candle jars, on this page, means purpose-selected vessels for container candles rather than drinkware, décor jars, or reused household glass. Here, best means easier sizing, clearer burn feedback, steadier repeat testing, and less setup confusion for early-stage makers. The focus stays on clear glass, shape, inner diameter, practical starter sizes, and reorder consistency, not full wick charts, deep safety testing, or premium vessel roundups. Questions about mason jars, recycled glass, exact wick matching, and full labeling systems are separate decisions, so the starting choice stays simple.
Best Beginner Glass Jar Profile at a Glance
For most beginners, the easiest glass candle jar profile to start with is a plain, clear, straight-sided candle jar in one modest single-wick size from a jar line you can reorder.
On this page, that profile is best because it is easier to size, easier to read during burns, easier to repeat, and less likely to add extra setup noise. It does not mean cheapest, prettiest, or fully safety-proven in every condition.
| Beginner need | Glass jar profile | Why it fits | When not to choose it first |
|---|---|---|---|
| Cleanest first baseline | Plain, clear, straight-sided candle jar in one modest single-wick size | It is easier to size, easier to read during burns, and easier to reorder for repeat tests | Not the right first pick if you are already choosing mainly for a premium presentation look |
| Limited comparison after the first baseline | Second clear, straight-sided jar in a nearby single-wick size | It adds a controlled size comparison without changing material or shape | Do not add it until the first jar line is already giving stable notes |
| Presentation-led upgrade | Heavier clear glass from a reorderable jar line | It gives a more finished look while keeping clear-glass visibility | Do not start here if presentation would distract from your first clean baseline |

- Start with a purpose-made candle jar rather than a random household glass.
- Use clear walls so soot, haze, residue, and melt behavior are easier to see.
- Use a straight-sided shape so first tests are easier to compare and repeat.
- Pick one modest single-wick size first instead of splitting attention across several capacities.
- Avoid heavily tinted, strongly curved, or lookalike substitute jars in your first baseline.
What Makes a Glass Candle Jar Suitable for Beginner Testing?
A beginner-friendly glass candle jar is a purpose-selected candle vessel that gives you a cleaner, lower-confusion starting point than random household glass.
On this page, a glass candle jar is a jar chosen for container-candle use, not a drinking glass, a storage jar, or a decorative container that happens to hold wax. Beginner-friendly means first-test practical, not luxury-looking or tuned for advanced performance work. The point is to start with a vessel that is easier to screen, easier to observe, and easier to repeat before you worry about premium presentation.
Use this first-pass screen before you compare shape or size.
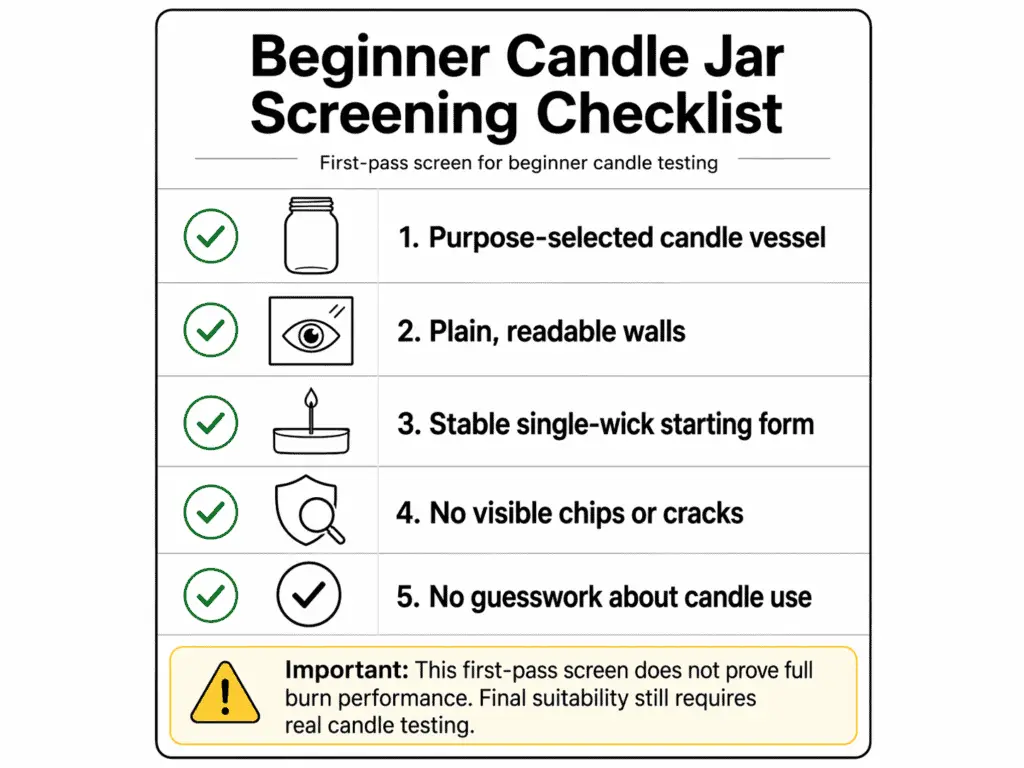
- The jar is sold or chosen as a candle vessel, not guessed into the role.
- The walls are plain enough to read during testing.
- The form is stable enough for a simple single-wick starting point.
- The glass has no visible chips, cracks, or obvious damage.
- The jar does not force you to guess whether it belongs in candle use at all.
It helps to be just as clear about what this section does not prove. A jar can look thick and still tell you very little about how it behaves in a full burn sequence. Purpose-made candle glass is the better-controlled beginner starting point, while jar-specific verdicts still depend on actual testing. Reuse questions, canning-style vessels, and deeper safety logic belong to separate decisions outside this narrow starting choice.
Why Clear Glass Gives Beginners Better Burn Feedback
Clear glass gives beginners better burn feedback because it makes wall clues easier to see while the candle is still teaching you what needs attention.
Clear glass lets you read the inside wall during early burns. That matters because beginners often learn by seeing residue, haze, soot marks, and melt behavior as they happen, not after the candle is already off track. Best, in this section, means easier to learn from, not prettier on a shelf.
A clear jar does not stop problems. It makes soot marks, frosting, haze, residue lines, and uneven melt behavior easier to notice sooner. That visibility helps beginners compare one burn to the next without tint, paint, or heavy decoration hiding the wall.
Clear glass is not a cure. It is a better feedback surface for early testing.
How Visible Soot and Frosting Speeds Up the Beginner Learning Loop
Clear glass makes visible soot and frosting more useful for beginners because you can spot clues earlier and make cleaner next-step decisions.
Soot is dark residue on or near the jar wall. Frosting is a light, cloudy crystal-like haze that can show on some candle surfaces or against the glass. Neither clue tells the whole story by itself, but both are easier to notice in a clear vessel than in one that hides the wall.
This page covers why clear glass helps you see those clues. Full diagnosis and remedy paths belong elsewhere. Once visibility is settled, jar shape becomes the next key variable because the wall profile changes how easy a jar is to read and repeat.
Why Straight-Sided Jars Are Easier to Standardize
Straight-sided jars are easier to standardize because even walls make early tests easier to compare, center, and repeat.
A straight-sided jar has mostly even walls from the lower body to the opening. For beginners, that shape gives a steadier baseline than jars with strong shoulders, sharp curves, or novelty contours. Best here means simpler to work with in first tests, not better-looking or better for every later-stage goal.
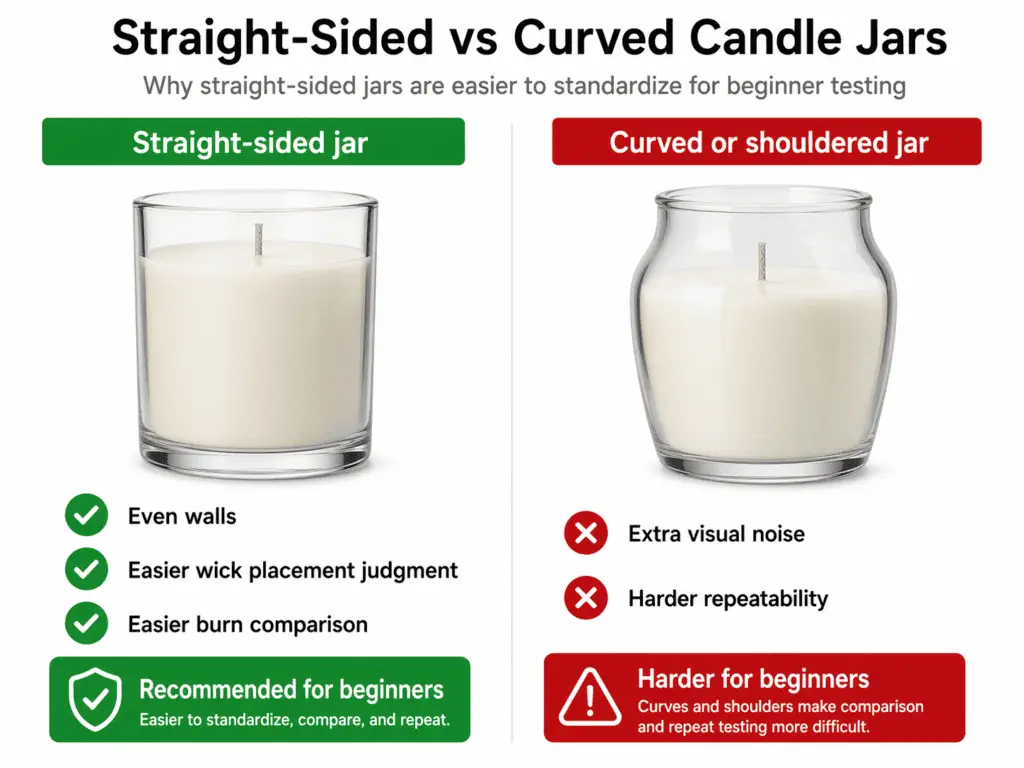
Straight-sided walls make wick placement easier to judge, reduce extra visual noise when you compare burns, and make the usable inside width easier to think about before you move into wick starting logic.
That does not mean every curved jar is wrong. It means shape should not add extra confusion during your first clean baseline. Decorative jars can come later, after you know what a simpler vessel is teaching you.
How Common Inner Diameters Reduce Wick-Sizing Confusion
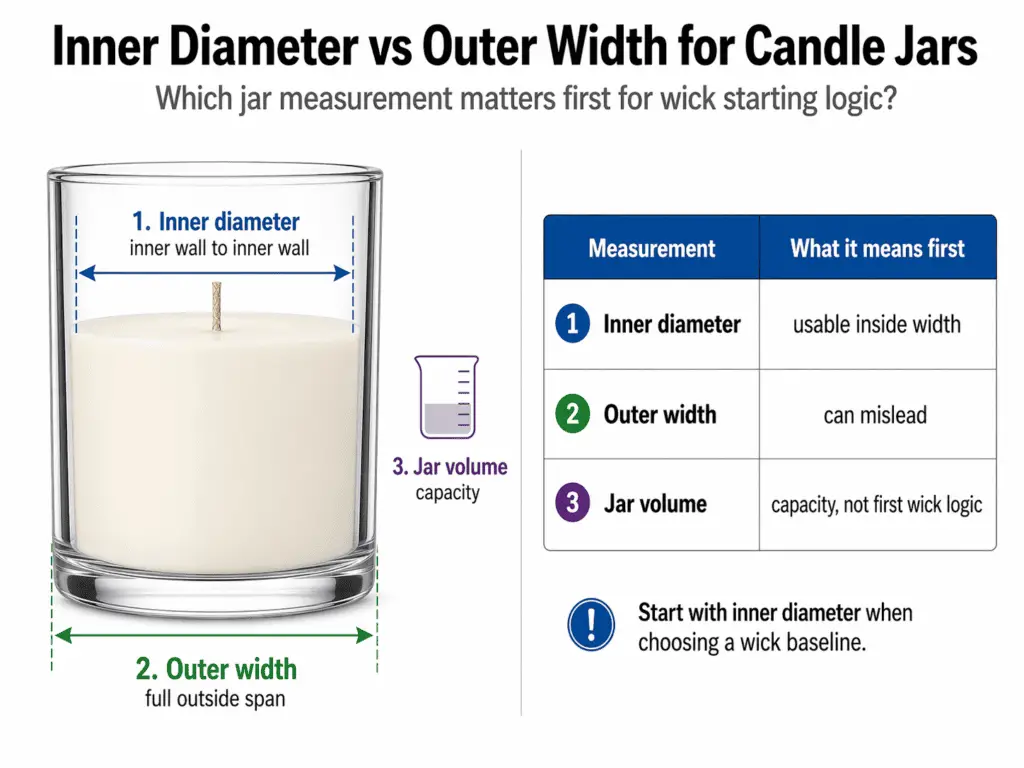
Common inner diameters reduce wick-sizing confusion because usable inside width gives a better starting signal than outer width or jar volume.
Inner diameter means the usable inside width of the jar, measured from inner wall to inner wall. That is the width that matters first when you are trying to make sense of wick starting logic. A beginner-friendly jar usually makes that width easier to identify and easier to match to a common starting range.
Here is the quick distinction that removes a lot of early confusion:
| Measure | What it tells you | Why it matters |
|---|---|---|
| Inner diameter | Usable inside width | This is the main starting point for wick selection |
| Outer width | Full outside span, including glass thickness | It can point you to the wrong starting range |
| Jar volume | How much wax the jar can hold | It helps with capacity, not first wick logic |
Common inner diameters help because they line up with more familiar starting ranges and reduce guesswork. Unusual widths are not wrong, but they tend to move a beginner into less familiar territory sooner. That is the real comparison on this page: common diameter as starter logic, not a promise that one width always gives one perfect wick.
Exact wick matching belongs on the separate wick-sizing page, not in this jar-selection step.
What Jar Sizes Are Most Practical for First Test Batches?
For first test batches, start with one modest single-wick jar size, then add a second nearby size only after the first baseline is stable.
A starter size is a jar size that keeps your early testing manageable instead of scattering your attention across too many capacities at once. Here, a modest starter size means one container size you can refill, compare, and retest without juggling several capacities at once. Best size, here, means easier to compare, easier to refill, and easier to retest, not biggest value or strongest throw. The fastest way to muddy early results is to buy several very different sizes before your first baseline is stable.
For most beginners, one modest single-wick size is the cleanest place to start. A second nearby size can make sense later, but only after the first jar is already teaching you something useful.
| Starter approach | What it helps with | What it makes harder |
|---|---|---|
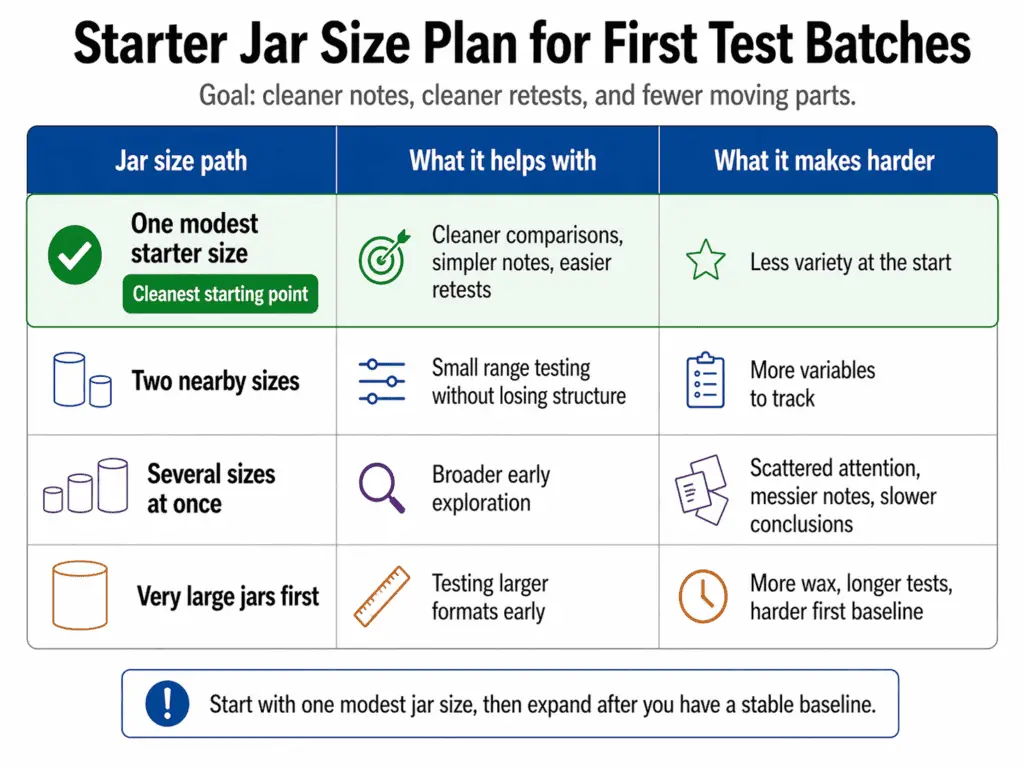
| One modest starter size | Cleaner notes, cleaner retests, fewer moving parts | Less variety at the start |
| Two nearby sizes | Limited comparison without full sprawl | More variables to track |
| Several sizes at once | Broad exposure to different capacities | Slower learning and noisier comparisons |
| Very large jars first | Fewer containers to refill later | More setup complexity from the start |
This is a planning rule, not a fill-weight formula. It tells you why size discipline matters early while keeping the first baseline easier to compare.
Why Repeatable Sourcing Matters After You Pick a Starter Jar
Repeatable sourcing matters because changing jar lines can change your testing conditions and blur what you learned from the last round.
Repeatable sourcing means choosing a jar line you can buy again with the same basic dimensions, finish, and overall format. Best source, on this page, does not mean cheapest seller or biggest catalog. It means a source that lets you keep the same baseline long enough to learn from it.
A lookalike jar is not always the same jar. Small shifts in usable width, wall profile, or finish can change how your next test reads. That is why sourcing belongs in beginner decision-making, even on an info-led page.
Use this simple sourcing screen after you settle on a starter jar:
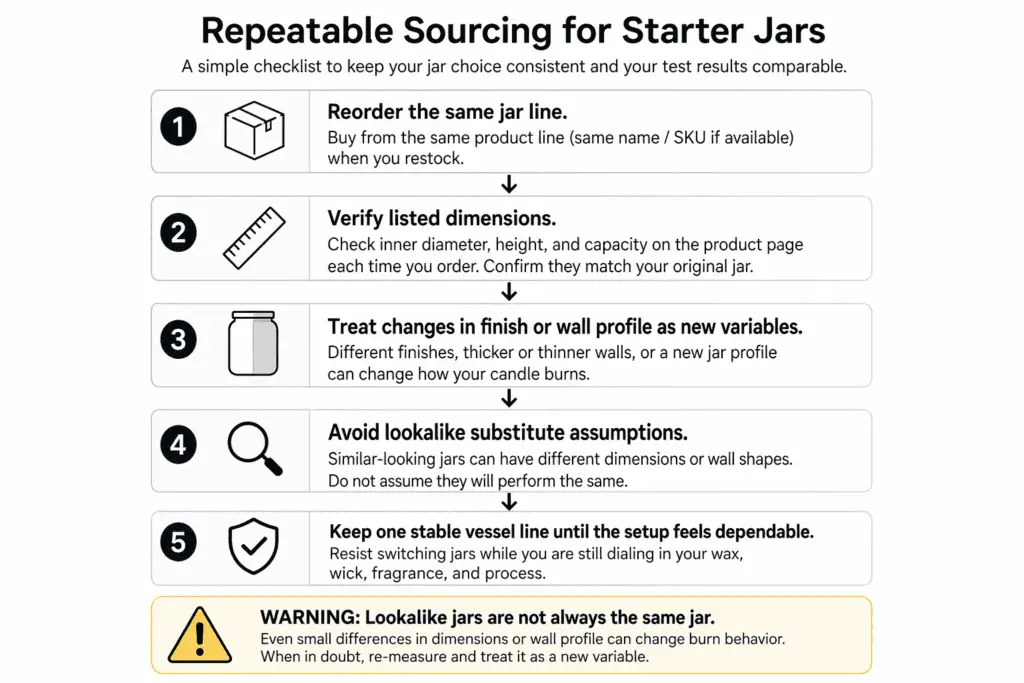
- Reorder the same jar line before swapping to a lookalike substitute.
- Check that the listed dimensions still match your earlier test jar.
- Treat a change in finish or wall profile as a new variable.
- Keep one stable vessel line until the first setup feels dependable.
This section covers repeatability as a testing-control factor, not a supplier directory.
When Heavier Clear Glass Is Worth the Upgrade
Heavier clear glass is worth considering only after you have a simple baseline and now need a more polished presentation.
A label-friendly jar has enough usable wall area for a clean, readable label. A retail-ready jar looks more finished for selling or gifting while still letting you see the candle through clear glass. That does not make it the default beginner choice. It only makes it a narrow upgrade path once presentation becomes part of the decision.
The key threshold is simple: start practical first, then move up only when your baseline is already working and you now care about shelf appearance too.
| Baseline-first path | Polished-upgrade path |
|---|---|
| Main goal: easiest early testing | Main goal: cleaner presentation after the baseline is stable |
| Best fit: first rounds of jar, wick, and burn observation | Best fit: early selling, gifting, or cleaner shelf appearance |
| Main benefit: lower setup confusion | Main benefit: a more finished look without giving up clear-glass visibility |
| Main caution: may look plain | Main caution: can pull attention toward presentation too early |
| What it does not prove: the jar is bad for selling later | What it does not prove: heavier glass is safer or better-burning |
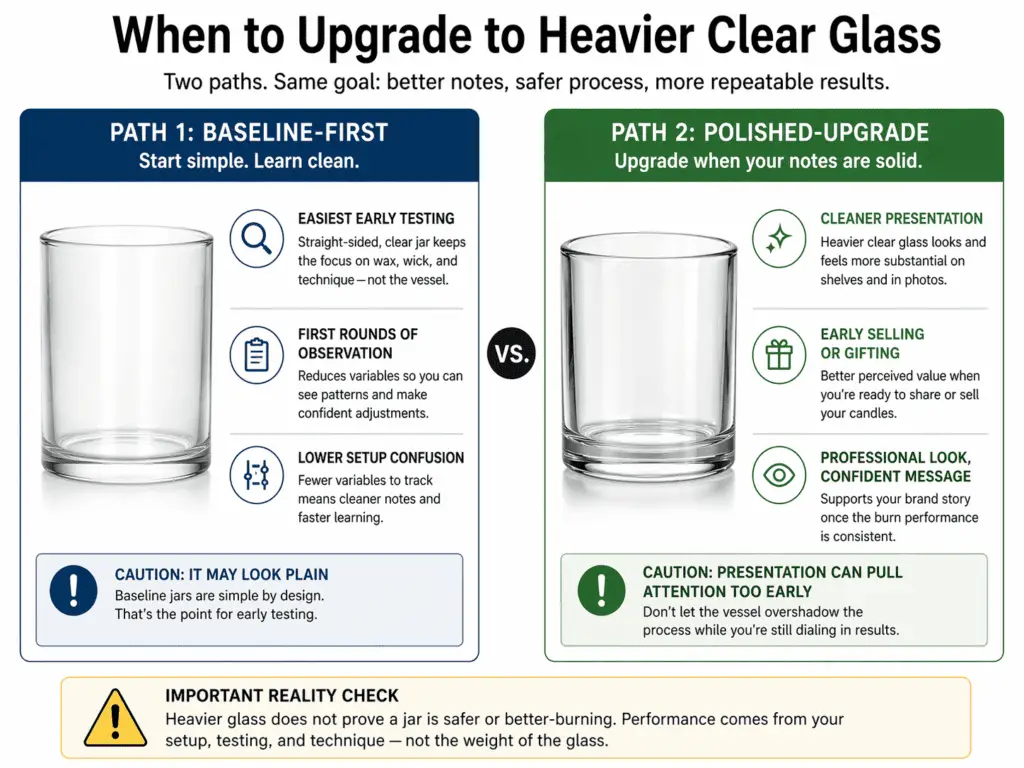
That last row matters. Heavier clear glass is not automatically safer, not automatically better-performing, and not automatically better for beginners. It is simply a later choice for beginners whose needs now include presentation.