
Ending up with a slimy batch of soap is something most new soap makers struggle with, and not knowing why this happens can be very frustrating. But with this article, hopefully, those days are over, within this article you will find the most common reasons why this happens and how to avoid them.
Why is my homemade soap slimy and oily? The primary cause for soap to be slimy or oily is not enough hard oils or butter (coconut, castor, avocado oil) were added. Another reason might be that it has not enough Lye or the Lye has expired and therefore is weak. This finally leads to a failed saponification process.
Whether you’re seeking a fun hobby, saving money, or pursuing a new business venture, our step-by-step guide makes crafting spa products enjoyable and easy, perfect for hobbies, saving money, or starting a business. Explore 126+ recipes, from soaps to lotions, with our beginner-friendly Quick Start Guide. Ditch store-bought products with unknown chemicals and embrace personalized, high-quality creations that cater to allergies and sensitivities using The Handcrafter’s Companion.
Slimy and oily batches of soap can be a true nightmare, and even to some novice soap makers, this is the reason for them to give up on this whole, homemade soap business. You may able to solve this problem by following a course but, many people don’t have the time or simply don’t want to.
To make homemade soap, you need exact measuring of carefully selected ingredients to have the ideal saponification process, and this is something you learn by making over and over.
Unfortunately, ending up with failed batches or batches that are slightly off is a bridge that all soap makers must go through. But the good news is, once you know why all of this happens, you can then start enjoying what you do, and you’ll see how satisfying it can be to have your own gorgeous looking and wonderfully smelling soap.
Lets first start with why your homemade soap is slimy as this the most common problem.
1. The type of oil you use.

We all have our favorite oil we love using, but unfortunately, some type may not really be suited (or at least a certain amount of it) for soap making. To give you some examples, Canola, Sunflower, safflower oil, with these oils, you will most likely end up with a much more slimy soap at the end. However, this is only the case when you use too much of it.
What is too much? Well depends on the amount of the other ingredients. What you need to remember is, do not use more than 40%. So this means, if you wish to substitute Olive oil with for example Canola oil, don’t use more than 40%.
Another note to remember is, the shelf life of some oils can be significantly shorter compared to Olive oil, so DOS (dreaded orange spots) can be a real issue with this type of oil.
A good and simple solution to this problem is simply increasing the number of hard oils (for example, lard, palm, cocoa butter, coconut oil). And as previously mentioned, do not use more than 40% of these types of oils, so mixing up is what you need to do. To be on the safe side, use a “calculator” like soapcalc.net to make sure all the numbers add up.
Another solution to this is to keep the number of soft oils high so your soap bar is extra conditioning.
In some cases Shia butter will also make your soap slimy, so be careful to not use too much of it. 2
2. It didn’t cure long enough.

Most soaps need around 4 weeks to cure, but this is highly dependent on the ingredients used. Hard oils tend to cure much faster, but if you are combining oils like most soap makers, the curing time would depend on the type and amount of oil used.
So, if your soap is slimy or oily; you may want to let it cure longer until you are satisfied with the results but keeping an eye on a regular basis to not “over cure” it.
As previously mentioned, some oils need more time than others, but some of them might even get better the longer it cures. For example, Olive oil gets harder, the longer it cures, and because of it also lathers better. But this is not the case with other oils, some of them might end up with DOS (dreaded orange spots) if they are left for too long.
This is because their shelf life is much shorter. So when choosing which oil you want to use in your soap, you should also take into consideration their shelf life.
What to do if you wish to decrease the time for the final process.
If you do not have the patience or time to let it cure for a more extended period, you can solve this by reducing the amount of water so you would also reduce the time it needs in the mold. Adding sodium lactate to the lye solution would also help in this case.
Another solution would be one that I have mentioned earlier, adding more hard fats/oils, they need less time to cure, but again, this depends on the amount and type of oils. To make sure you are using the correct measurements, run it through a lye calculator.
3. Weak or Inactive Lye

This is not something you encounter much, but there is a possibility that the Lye you used has gone bad or has expired. You can confirm if the bottle of Lye you are using has lumps or clumps in it. If the Lye is clumpy, it is most likely due to moisture and humidity in the air, Lye tends to absorb it over time.
Because of the absorbed moisture, the amount of water that it comes with makes it uneven, and as a result, your soap will end up with less Lye but more water in the end.
Another way to know if the Lye solution is weak is when it does not get hot enough, and it doesn’t reach trace fast enough, which finally leads to oily soap.
An easy way to prolong the Lye’s shelf life, make sure to store it correctly, which means: in its original bottle and tightly sealed. Also, buying from a vendor with a label that says sodium hydroxide is a must if you wish to have quality ingredients. Some labels may say potassium hydroxide, but you should stay away from them as they are more suitable for liquid soap.
4. Soap sweating
If you are new at soap making, you probably have heard or read somewhere about soap sweating. The whole point of the curing process in soap making is that the water within the soap can evaporate. However, if the environment where it’s cured is not dry or worse, is very humid, the chances are that your soap will sweat.
Sweating happens when the soap absorbs the humidity and moisture from the air. The more humidity, the more it will “sweat,” that simple. Unfortunately, a lot of people tend to think that sweating also leads to slimy soap, but that is not the case.
Sweating makes it look like some type of frost layer at the very beginning, but if you take a closer look, you will see it’s actually small water bubbles/droplets on the surface. Because there is such a big misconception around this subject, I thought it was enough for it to be a part of the list.
5. Superfatting

Superfatting soap is something that many soap makers use, but using too much of it may be another cause for your soap to be slimier or too soft. Superfatting is used to moisturize your soap when it’s too hard on your skin, but if you are not entirely sure if you are using too much of it, you will undoubtedly end up with too much of it.
The amount one should use depends on the type of soap (oils used in the recipe), but the average should be between 1-7%. Most soap makers go for 5% with their cold process recipes, but again this is a personal preference.
The ideal balance between a firm and a less slimy bar can only be reached after some trial and error; while doing so, one should also keep in mind that it is also gentle on the skin.
What to do if you have Slimy soap?
Don’t throw it away yet, as mentioned previously, just let it cure for a little longer. You can also repurpose your leftover soap. Rebatching is a great way to get those “failed” batches to use as scraps. If you wish to rebatch, use a small amount of liquid (distilled water is ideal) and melt it. You can also make soap balls with scraps.
Why is your homemade soap oily?
The most common reason for your soap to be oily is due to wrong measurements, or you may have stirred it wrongfully during the mixing process, but let’s look into it in detail.
6. Stirring during the mixing process.
Many new soap makers don’t realize the importance of the mixing process. If during the mix, emulsification does not occur in cold process soapmaking, you most likely will end up with a failed batch. But most people call this phase the trace phase.
What is trace, you might ask? Trace is the point where both lye and oils are perfectly mixed, and oil is no more visible, which is also called emulsification. Once you reach a thin trace, your soap will just keep on thickening from that point on till you can pour it into your mold.
However, in some cases, some people may think that trace happened, but in fact, it would just be some solid ingredient in the mixture that cooled off and started to thicken. It’s important to be sure that the emulsification happened, so make sure you are mixing enough.
To be on the safe side, you can leave your mixture undisturbed for 30 to 35 seconds, if your mixture loses the trace or it has developed oily sheen, you are most likely looking at a false trace, and if you were to continue with this batch this is what finally leads to oily soap at the end!
7. The right temperature.
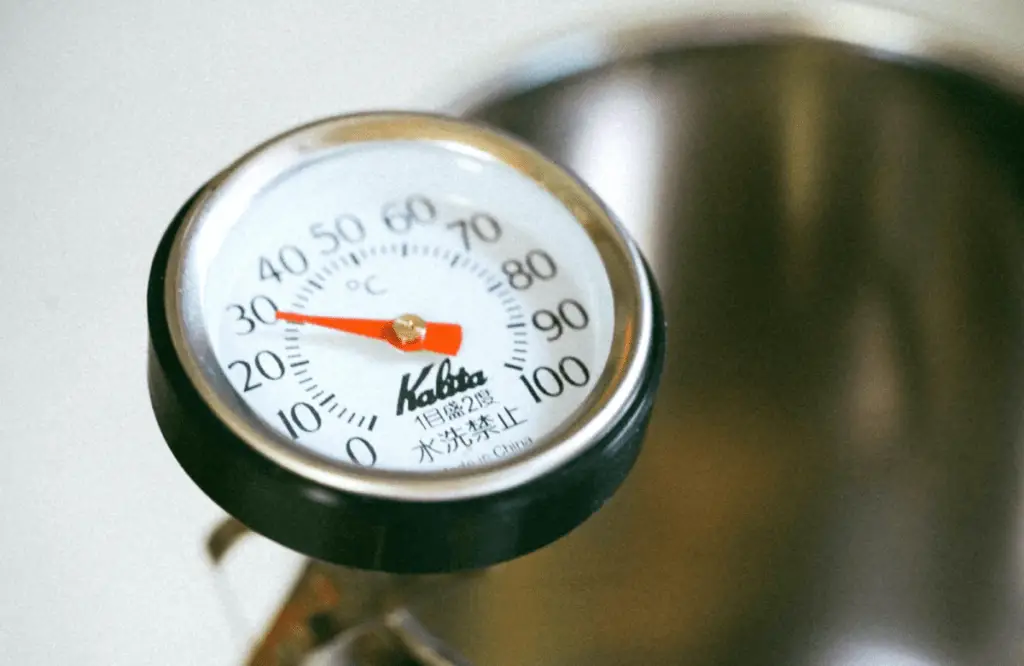
We discussed how important it is to mix long enough till you reach trace with cold process, but the temperature you need to mix is equally important. If you were to ask what is the ideal temperature to mix online, you would most likely receive a wide range of different answers. The reason for this is that it depends on the recipe.
But the temperature most soap makers prefer is around 120 to 130 °F. The reason for these temperatures is, that the ingredients are melted. Different ingredients such as butter and oils melt at different temperatures you need to reach a point where all of them melt.

If in case you do not have the right temperature and your ingredients have not melted, you may reach a false trace, and as mentioned earlier, this will eventually lead to a failed batch. To avoid false trace, make sure to mix long enough and make sure to have the right temperature.
Using a thermometer, in this case, is a must. Even as a veteran, a thermometer is essential to have.
8. Wrong measurements
As mentioned at the very beginning of the article, if your measurements are not correct, you will most likely end up with a failed batch, in this case, an oily batch.
The solution for this is straightforward: use a Lye calculator to test if the scale and accuracy are correct before you start doing anything.
9. Fragrance oils causing seperation.
This is something you might not like to read, but it might be possible that the fragrance oil you are using is causing separation.
If that is the case, here is what you can do:
The next time you are making soap, save some of the warmed soapmaking oil for later. Once you reached a light trace and are at the point where you want to add your fragrance oil, mix the saved amount with the fragrance oil, and blend it with the light trace.
You can also simply mix the two oils before you even mix them with Lye, but make sure the oils are warmed up when mixing them.
What happens if your soap is oily?
If you end up with oily soap, you can still repurpose it.
Here are two things you can do:
You can shred it with a cheese grater for later use. For example, if you have a 5% Lye discount batch (needs to be traced), you can throw it in, and the new batch will absorb the excess oil. As an extra, this will add a decorative effect to your new batch!
You can do the same with a hot process soap, this too you add when you reached trace and throw it in, and again, the excess oils will just be distributed with the new batch.
As a final solution, you can melt down the batch and add a little amount of Lye solution to get it back to the ideal mixture, but this might need a few trials as it’s hard to get the right amount from the first time.
Conlusion
Some people may think they have slimy soap while it’s just conditioning. Some consider soap slimy, while others may not. If your soap is sweating, it’s not slimy, it’s just “wet” due to the water droplets on the surface.
Ending up with slimy soap is something that occurs often but can be avoided, and if in case you do end up with slimy soap, you can still repurpose it so it’s not the end of the world!